When I first started investigating EMF exposure in homes, I quickly learned that dirty electricity was one of the most overlooked sources of electromagnetic pollution.
While we can’t see it and most of us can’t feel it directly, this high-frequency electrical noise can permeate our living spaces 24/7, potentially affecting our health and wellbeing.
That’s why I was eager to test the TriField EM100 meter – a tool specifically designed to measure this invisible form of EMF.
Understanding Dirty Electricity
In modern homes, dirty electricity (high-frequency voltage transients) is produced by numerous devices including LED bulbs, solar inverters, dimmer switches, and anything with a switching power supply.
These erratic electrical frequencies can radiate from home wiring, creating electromagnetic fields that some health practitioners suggest may affect wellbeing.
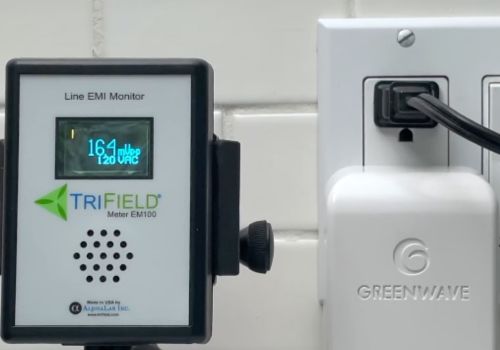
TriField EM100 Overview
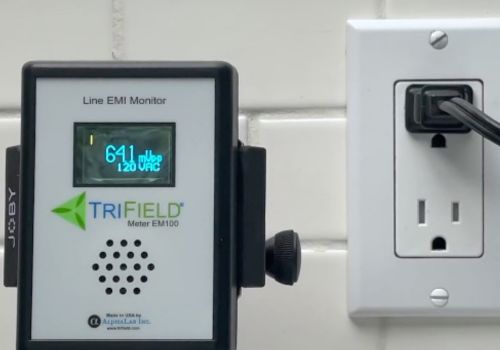
The TriField EM100 is designed specifically to measure dirty electricity, operating in the 10 KHz to 10 MHz frequency range where most dirty electricity occurs.
Key Features
- Immediate readings in millivolts peak-to-peak (mVpp)
- Audio detection for source identification
- Built-in line voltage verification
- Simple plug-and-play operation
- Made in USA
- 1-year warranty
- Price: $140-160
Technical Operation
The meter provides two key measurements when plugged into any outlet:
- Line voltage verification
- Dirty electricity levels in mVpp
The built-in audio feature converts electrical noise into audible sounds, helping identify specific sources of dirty electricity such as problematic fixtures or devices.
Click here to find the best price
How To Use The TriField Dirty Electricity Meter: Step-by-Step
- Initial Setup
- Ensure the outlet you’re testing is properly grounded
- Turn on normal household electrical loads (lights, appliances you typically use)
- Have a notepad ready to record readings
- Taking Measurements
- Plug the meter directly into the outlet (avoid using extension cords)
- Wait 5-10 seconds for the reading to stabilize
- Note both the line voltage and mVpp readings
- Listen to the audio feedback – a cleaner electrical environment will produce less noise
- Identifying Sources
- Start with a baseline reading
- Turn off one device at a time
- Wait 5-10 seconds after each change
- Note any significant drops in readings
- Pay attention to changes in the audio tone/intensity
- Mapping Your Space
- Test every accessible outlet
- Mark high readings on a floor plan
- Note nearby electrical devices
- Test at different times of day for a complete picture
- Installing and Testing Filter Effectiveness
- Take a baseline reading at the outlet where you plan to install the filter
- Install the filter according to manufacturer instructions
- Wait 5-10 seconds for readings to stabilize
- Take a new measurement at the same outlet
- Also test nearby outlets to see how the filter affects the whole circuit
- Record the before/after readings to verify improvement
- Interpreting Results
- Record baseline readings for future comparison
- Note patterns (e.g., higher readings near certain types of equipment)
- Compare readings to the measurement guidelines below
Measurement Guidelines
Based on extensive testing, these guidelines help interpret readings:
- Under 50 mVpp: Optimal for sensitive individuals
- 50-100 mVpp: Acceptable for most people
- 100-150 mVpp: Consider mitigation if sensitive
- Over 150 mVpp: Mitigation recommended
- Over 500 mVpp: Immediate attention needed
Best Testing Practices
Here are the best practices for accurate assessment:
- Take baseline readings in every room
- Document measurements at different times of day
- Pay special attention to sleeping areas
- Test before and after any mitigation efforts
- Recheck periodically when adding new devices
Advantages
- Intuitive operation requires no technical background
- Reliable, consistent readings
- Durable construction
- No battery issues (powered by outlet)
- Effective audio feedback for source identification
Limitations
- Single-purpose tool (measures only dirty electricity)
- Cannot measure upstream grid pollution
- No data logging capability
- Speaker cannot be disabled
- Limited to testing accessible outlets
Comparison with Alternatives
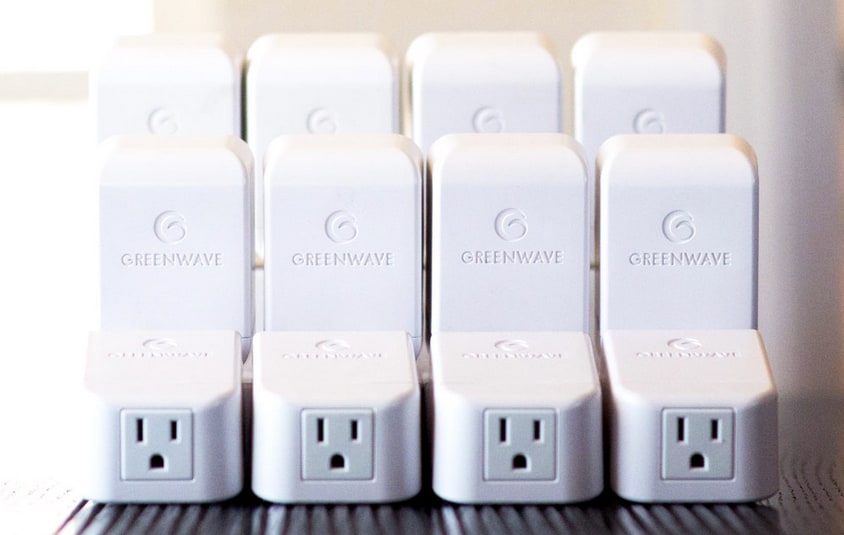
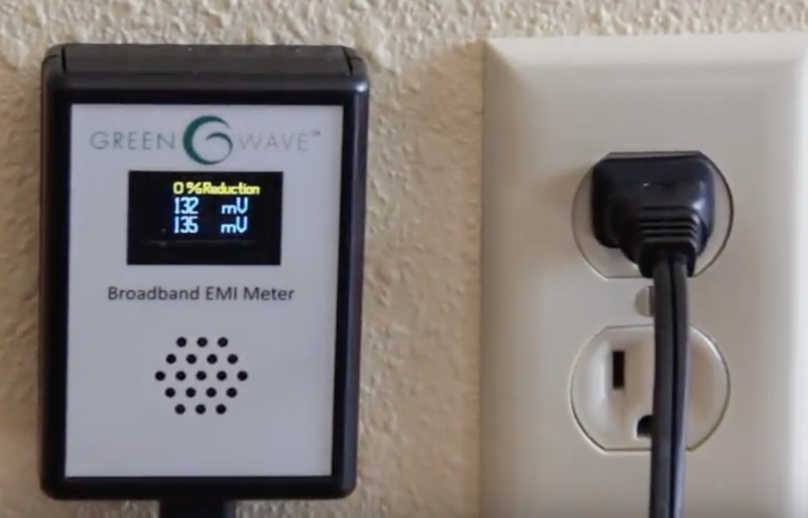
The TriField EM100’s primary competitor is the Greenwave Broadband EMI Meter, which operates in a similar frequency range and shares the same price point ($140-160). While both tools effectively measure dirty electricity, the TriField’s audio feature provides additional help in source identification.
If you’re interested in exploring different measurement options, check out my post about the best dirty electricity meters before we dive into this specific model.
Mitigation Options
Once high levels are detected, two main approaches exist for reducing dirty electricity:
- Plug-in filters for specific circuits
- Whole-house filtering systems
The TriField EM100 can verify the effectiveness of either solution through before and after measurements.
User Feedback
Professional and home users generally report:
- Reliable operation and consistent readings
- Effective audio feature for source identification
- Durable construction
- Learning curve for interpretation
Common criticisms center on the single-purpose nature of the tool rather than its performance.
Conclusion
The TriField EM100 proves to be a reliable tool for measuring dirty electricity, with its straightforward operation and consistent readings making it suitable for both professionals and homeowners.
While the price point matches market standards, the single-purpose nature means it should be considered as part of a broader EMF measurement toolkit rather than a standalone solution.
Its ability to provide immediate feedback and verify mitigation efforts makes it a valuable tool for those serious about addressing dirty electricity in their environment.tion efforts makes it a valuable tool for those serious about addressing dirty electricity in their environment.