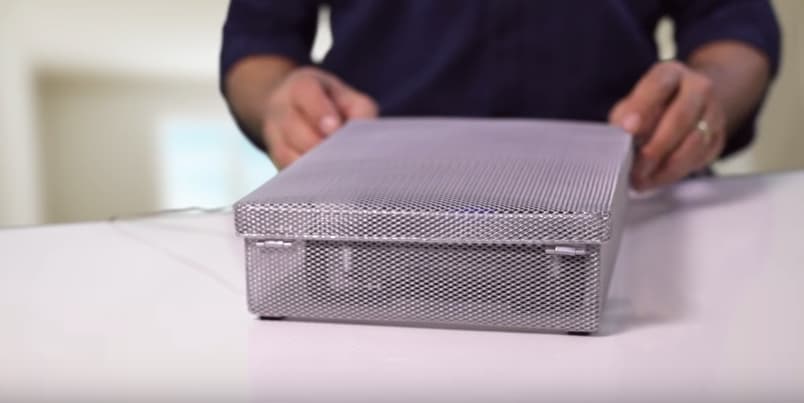
With the world moving towards wireless everything, people may wonder why you would ever want to switch to a hard-wired internet connection.
And although it may be less convenient, switching away from wireless internet is actually better for your health, security and privacy, and gives you faster, more stable internet. Why Switch to Hard Wired Internet
Wireless devices emit high levels of electromagnetic fields (EMFs), which if you’re here, I’m sure you know has a negative effect on your health. In 2011, the International Agency for Research on Cancer categorized radio frequency radiation as a possible Group 2B carcinogen.
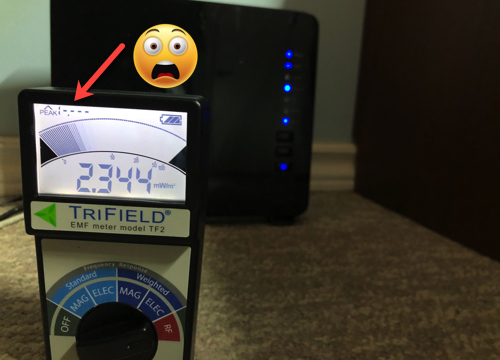
Your WiFi router, cell phone, tablet, laptop, smart technology, printer, etc., all emit RF radiation and usually really close to your body. So it makes sense that if you’re concerned about EMFs, you’d want to switch to a hard-wired connection to significantly reduce your exposure from all of your devices.
If you don’t know much about the EMFs in your home, you may want to check out EMF meters which can measure the emissions from devices in your home and around you.
Getting rid of WiFi in your home isn’t easy for everyone and you don’t have to go 100% hard-wired. Any change you do reduces your exposure helps overall so don’t be discouraged if you don’t want to or can’t go 100% hard-wired.
This guide will show you how to go hard-wired and how to make other changes if you can’t go 100% wireless.
Speed and Security Advantages
Hard wired internet offers faster and more consistent connections compared to wireless networks.
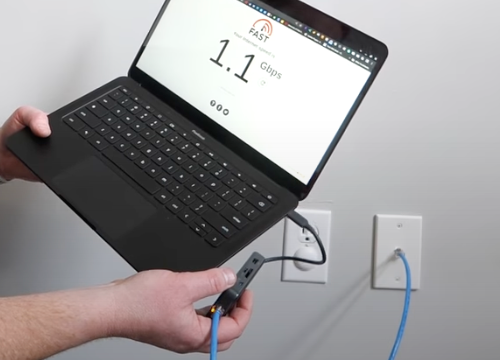
When connected via an Ethernet cable, you experience minimal interference from other devices or environmental factors that can disrupt wireless signals.
- In 2020, an RJ45 Ethernet cable could transmit up to 10 Gbps over distances of up to 100 meters – much higher than a standard Wi-Fi signal
- Research suggests that wired connections reduce packet loss by nearly 30% compared to wireless ones
Hard wired connections are inherently more secure since they require physical access to the network via an Ethernet cable.
Wireless networks are susceptible to potential security breaches from hackers as they broadcast signals beyond your premises. By using a hard wired connection, you eliminate the risk of unauthorized access to your internet connection.
How To Set up Your Hard Wired Internet Connection
Switching over to hard-wired internet involves some planning, some problem solving, and a few steps.

It can get frustrating so I’m hoping to make this process easier for you and give you a simple step-by-step guide.
Of course every home and electronics being connected is unique, so this will be an overall/universal guide to help get you started.
The goal here is to have the devices that require internet (like computers, printers, tablets, gaming consoles, TV, cell phones, Smart home devices – if you use them, etc.) connected through ethernet cables and your WiFi disabled.
Here are the steps to establish a hard wired connection:
1. Plan Your Wired Internet Setup
Your modem and router are set up by your internet provider. So your hard-wired blueprint will start at this location. You may have a 2-1 modem/router, which means you have one unit that has built in WiFi or you may have two separate boxes.
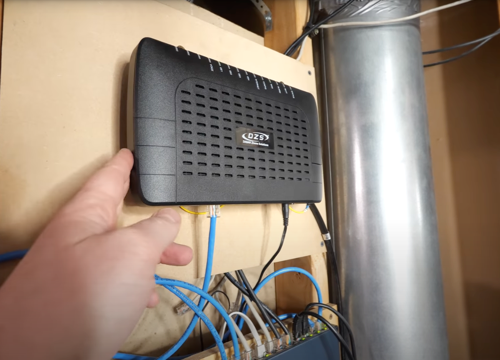
The modem brings internet service into your home and your router delivers internet, via WiFi or ethernet to your devices.
If you’re just installing your modem and router, you get to pick where the hub of your wires will be. Ideally, it should be in a central location within your home or office to ensure optimal coverage throughout.
If you plan on using any WiFi, and really as a general rule, keep your modem and router far from bedrooms.
Now do a visual plan, drawing it out with a floor plan of your home will help. Mark off your router, TVs, computers, consoles, etc.
Set locations where you know you’ll need an internet connection and any spots where you’ll want to use the internet, like a specific chair or couch where you use your tablet or smartphone.
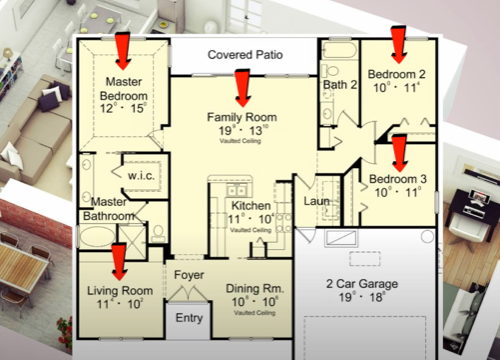
Locations to consider for ethernet cable ports:
- An office
- Living room, rec room TV, media room
- Bedroom (although I recommend keeping internet out of this space)
- Kitchen
- Workout area if you stream while you exercise or have a Peloton
- Spots for possible voip phones
Some areas will probably require more than one port, like your workspace or office.
**Just a safety note – consult or hire a professional electrician if you’re going to be installing your ethernet cables into your walls, using gang boxes, floor biscuit jacks, or keystone plates.
2. Determine How Many LAN Ports You Will Need
Add up all the the spots on your floor-plan where you need connections, this tells you how many cables and LAN ports you’ll need.
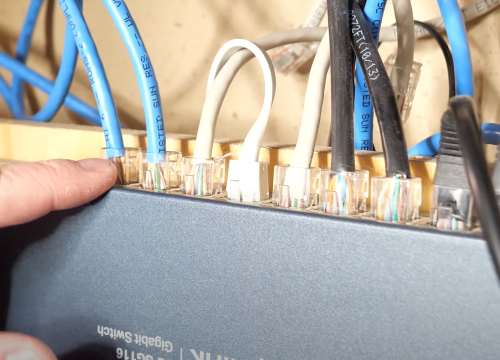
I’m going with the assumption you are running cables along the floor throughout your home, as the most cost-effective method. It doesn’t look as pretty, but it gets the job done.
You can also hire a professional who can hardwire ethernet ports into your walls so each room has multiple LAN ports easily accessible. More aesthetically pleasing but it will cost a lot more. Definitely something to consider if you’re building a new home.
3. Purchase an Ethernet Switch
Your router likely only has a couple LAN ports but in order to be able to provide internet connections everywhere you need them, you will need an Ethernet switch. An Ethernet switch plugs into your modem/router and gives you multiple LAN ports.
You can buy 5, 8, 16, and even 24 port Ethernet switches. It allows for faster connectivity for many devices at the same time.
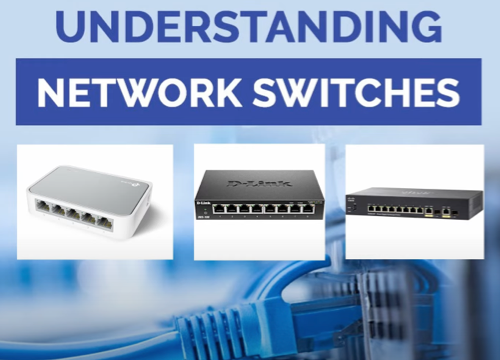
If you have have a high bandwidth requirement, ie. multiple computers, streaming, and consoles at one time, you may want to consider a Gigabit Switch or 1G switch. It allows for faster data transfer (1000 megabits per second).
Considerations when choosing an Ethernet switch:
- Number of ports needed
- Data speed requirements
- Managed vs unmanaged – advanced functions to monitor networks and “fancy features”
- Fanless or not – for silent operation
- PoE function (power and internet through one cable)
- Cost – basic or fancy features
4. Decide on Ethernet Splitters
If you don’t want to have several long Ethernet cables running through your house to every room, you can use a network splitter.
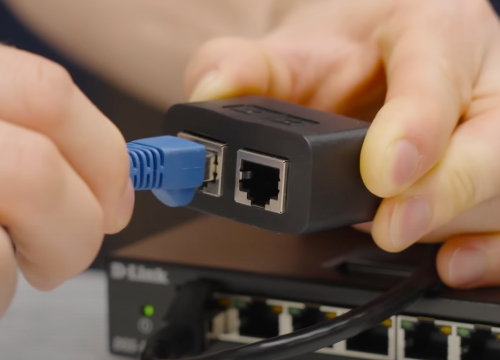
A splitter will have two (maybe 3 ports), allowing you to run one Ethernet cable to a room but two connections on that one cable. This will save on the cost and messiness of Ethernet cables.
5. Connect Your Ethernet Cables
You’re almost ready for hard-wired internet. Your hub is organized, now you need to connect your switch to your devices via Ethernet cables. Handle them with care. Be careful not to pinch them or pull them too tight.
Options for concealing and organizing your Ethernet cords:
- Baseboard and Wall Cable concealers
- Cable covers – around your desk
- Corner Ducts Raceway – looks like crown molding
- Dedicated covers
- 3m Command clips
- Hide behind furniture, rugs
- Gaffer tape
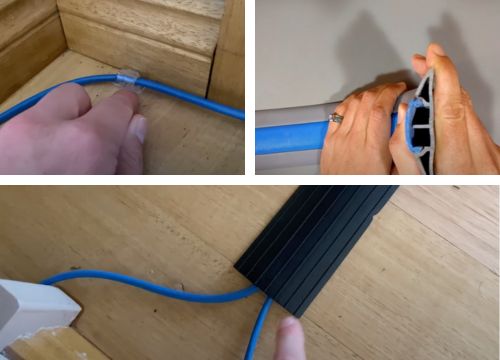
Consult or hire a professional electrician if you’re going to be installing your Ethernet cables in your walls, which could affect other electrical wiring and if you plan on using gang boxes, floor biscuit jacks, or keystone plates. Safety first!
It’s pretty easy to run cords along the floors in your rooms but there are some things to consider, like proximity to electric wires, when installing your Ethernet cables behind the walls or through the ceilings.
Purchasing Ethernet Cables
Either way you’ll need a supply of Ethernet cables. When purchasing Ethernet cords there are several things to consider; length, speed, durability, material.
Length
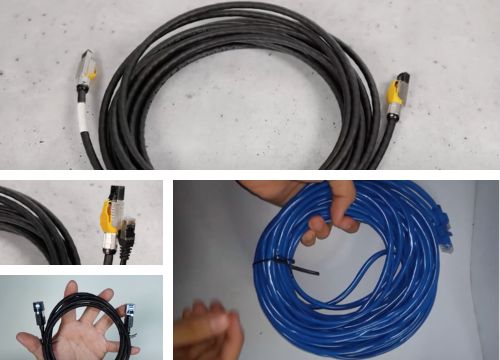
Ethernet cords can be 3 feet long up to 300 feet in length. Make sure to measure the length you need based on your floor plan so your cables aren’t too short or too long. A little extra length isn’t going to hurt – but not enough will.
You can also cut the cord to fit the space you need. You can find video tutorials on how to do this, if you’re experienced with electrical wires.
Speed
There are different categories of cables and yours should be compatible with your home internet speed. The slowest is Cat 5 or 5E. It will be the cheapest cord. Cat 8 is currently the fastest and more expensive. For most homes, Cat 6 will be more than sufficient for high-speed internet.
Shielding
Since you’re going through all this work to reduce EMFs in your home then you will want to buy shielded cables.
Shielding keeps interference out of the cable, prevents crosstalk, but most importantly it blocks electric field and RF emissions coming from your cables.
- Cat 7 and Cat 8 cables are all shielded with twisted copper pairs and an overall cable shield. You’ll see S/FTP on the package and cord, for screen-shielded Ethernet cable/ foil-shielded twisted pairs.
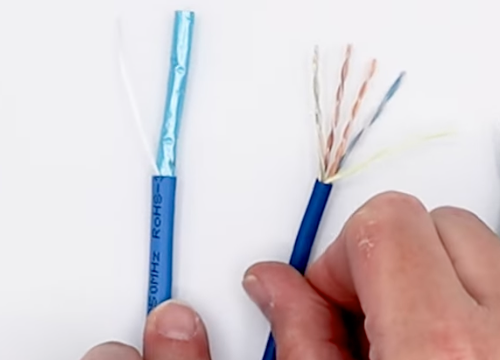
- Cat 5 and 6 come shielded and unshielded. U/UTP means unshielded and no outer shielding, F/UTP means it has outer shielding but unshielded twisted pairs inside.
Durability
Ethernet cables are rated on durability based on their materials. They typically are expected to last between 5 and 7 years. I spoke to an IT friend of mine who said he’s seen cords last 20 years in a clean environment.
A higher quality cable will cost you more up front but will last much longer, saving you money in the long run.
How to make your Ethernet cables last:
- Use in a dry environment
- Handle them with care
- Choose plenum-rated cables over PVC
- Don’t pull it tight, keep it pinched or kinked
Choose pure copper wires for a better connection and further distance over copper-clad aluminum. Gold plated cables are non-corrosive, durable, and highly conductive.
6. Connect Devices
With your hard-wired set up now connected and powered up, you can start connecting your devices using Ethernet cables.
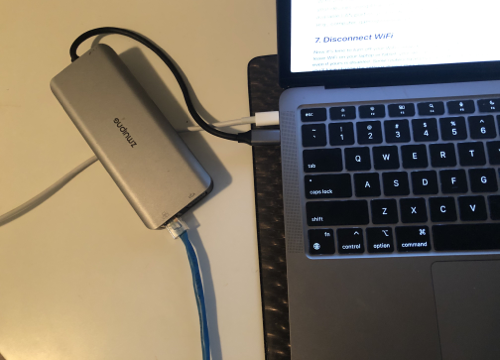
Connect one end of an Ethernet cable to any available LAN port on your router, and the other end to the device you want to connect (e.g., computer, gaming console, etc).
7. Disconnect WiFi
Now it’s time to turn off your WiFi connection on your router and on your devices. If you leave WiFi on your laptop or tablet, your device will continue searching for a network, even if yours is disabled. Some routers have physical buttons to disable Wi-Fi, otherwise you’ll have change the settings in your manually.
You will have to connect to your router’s gateway IP address over a web browser while connected to an ethernet cable. Your gateway should be on a sticker on the bottom of your router. You’ll be required to log in and disable your wireless network. You can look up instructions for your specific modem-router or contact your service provider directly for support.
Test Your Connection
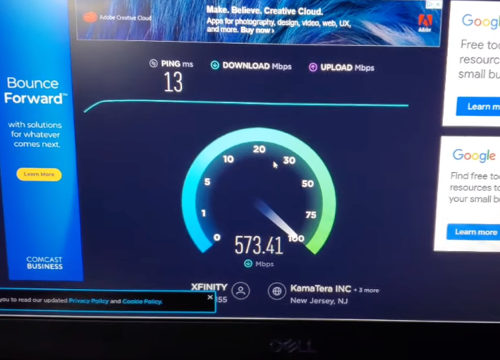
Once all devices are connected via Ethernet cables, test your internet connection by opening a web browser on your devices and visiting a website. If the connection is successful, congratulations! You have successfully established a hard wired connection.
It’s important to note that the steps involved in establishing a hard wired connection may vary slightly depending on the specific modem and router models you are using. Always refer to the user manuals provided by the manufacturers for detailed instructions.
Connecting Your Devices
While wireless connections are convenient, if you are concerned about EMFs then using a hard-wired connection will reduce your exposure. Some electronics are easier to set up and use without wireless, like your computer or laptop.
While other devices require adapters and adjusting to hard-wired use, like your cell phone or tablet. Here’s how you can connect your devices to a hard-wired internet connection.
Laptop/Computer
Depending on your laptop, you may be able to easily plug your cable into an ethernet port. If you have a newer Mac or many 13” or 14” laptops, you will most likely have to purchase a USB to Ethernet Adapter. They’re available for $10-$35.
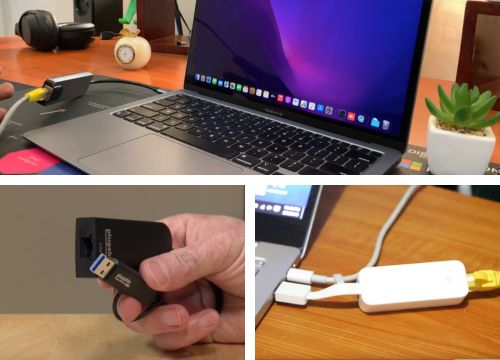
If your laptop has a USB-C type port instead (like in a Mac), then I suggest a Thunderbolt dock that has an Ethernet port. I use a dock with more than 10 ports to connect my MacBook to a monitor, ethernet, wired keyboard and mouse, etc.
You can also connect your printer to your computer through the LAN port if you have a wireless printer.
Tablet/Mobile Phone
Tablets and smartphones don’t come with LAN ports so you will have to get an adaptor for your device.
Most Androids and newer iPads require a USB-C to ethernet adapter while some older phones and tablets may need a micro USB to ethernet adapter. For iPhones and older iPads, you will want to purchase a Lightning to Ethernet adapter.
Make sure to manually disconnect your WiFi, Bluetooth, Siri and put your smartphone into Airplane Mode so that it is only using the hard-wired connection and not pinging signals trying to connect wirelessly.
Using a wired connection for your cell phone will be an adjustment. You may want to leave it on a table where your ethernet cable is located so that you train yourself to use it in a fixed location. This will significantly reduce the EMFs in your home but your phone will still emit Extremely Low Frequency (ELF) fields so you still want to try and limit your use and ideally not scroll or stream for hours on your phone or tablet.
Tips For Using Your Cell Phone Wirelessly
If you want to still use your mobile phone wirelessly, that’s understandable. No judgement here! By connecting your other devices with hard-wired internet, you’re significantly reducing the EMFs in your home.
Here are a few tips if you still want to be wireless with your phone:
- Use WiFi over cellular data – WiFi emits lower EMFs
- Put it in airplane mode overnight and don’t keep it next to your bed
- Download podcasts, movies or shows, and watch them in airplane mode instead of streaming
- Use AirPods or your speaker when making a call
- Try to limit your use to reduce your EMR exposure
Hard Wiring Nintendo and Other Gaming Consoles
If you’re a gamer, then you understand the need for a stable and lag-free internet connection.
Hard-wiring gaming consoles can offer improved online multiplayer experiences with reduced latency issues, and bonus less EMFs.
If you’re using a Nintendo Switch console or any other gaming console that supports a wired connection, here’s how you can do it:
Step 1: Connect an ethernet cable to the ethernet port at the back of your console. I recommend you use a Cat 5e or higher cable. Consider the length of cord you’ll need and always go a bit longer than necessary.
Place your Nintendo Switch console into the Nintendo Switch Dock if you haven’t done so already. It’s important to note that the original Nintendo Switch console without a LAN port on the dock would require a USB LAN Adapter, while the newer OLED model doesn’t need one when using the dock with a LAN port.
Step 2: Connect the other end of the cable into the LAN port at the back of your router.
Step 3: Navigate to the HOME Menu on your console and select “System Settings.”
Step 4: Within the System Settings menu, choose “Internet” or “Network” and then “Internet/Network Settings.”
Step 5: Your console will typically automatically search for nearby Wi-Fi signals. Once this option is available, select “Wired Connection” instead.
For Playstation 5 select “Set Up Wired LAN.”
Step 6: Select “Connect to the Internet via Wired Connection” or simply “Connect” for Playstation and wait for the console to establish a connection. Xbox will automatically switch to wired connection.
Step 7: Not necessary, but you can always test your connection in the Test network connection settings.
Great job! Now your Playstation, Xbox, or Nintendo Switch console is connected to the internet via a hard-wired connection. You can enjoy smoother online gaming sessions with potentially reduced lag.
What If I’m Not Ready To Ditch My Wireless Router?
I completely understand if you want to reduce the electromagnetic frequency radiation in your home but you’re not ready to or just don’t want to fully switch to a hard-wired connection.
Another option is to switch your router to the JRS Eco 100 D2 on ASUS. This is the router I have in my home. Here are a few reasons it’s a great router to switch to:
- It has a standby mode, so it only sends out signals when you’re actually using the internet otherwise it goes into sleep mode and no EMFs are emitted
- You can set a timer to turn off the WiFi while you’re at work or sleeping, or simply use the on/off WiFi button
- You can still use a hard-wired connection at your desk or wherever you want
- It emits 90% less beacon signals than regular routers, without losing speed or quality
This way you’re kind of getting the best of both worlds. You’re not constantly having WiFi beacons pinging around you 24 hours a day but you can have the convenience of the internet when and where you need it.
Wireless Router Considerations
WiFi routers emit high levels of RF radiation and over a wide distance. You don’t want to be next to one for long periods.
So if you’re still using WiFi, you’ll want to take into consideration where the router is located in your home and make sure it’s not in a bedroom or adjacent to a bedroom wall, or in a room where a pet sleeps.
Consider adding a router guard, using a timer to turn it off when there are long periods where you won’t be using it, and go into your wireless settings to reduce the transmission power on your router.
These are all easy things you can do to reduce the EMFs from your wireless router if you’re not quite ready to go fully hard-wired.
Troubleshooting Wired Connection Issues
- When it comes to troubleshooting wired connection issues, you will want to approach the problem systematically. There are a number of possibilities your internet isn’t working.
- First, a basic but often overlooked step is to check if all cables and wires are securely connected. Loose or damaged cables can disrupt the connection and cause intermittent or no internet access. So take a moment to ensure that all connections are snugly fit into their respective ports.
- Next, turn off your WiFi. If you have your ethernet cables and WiFi running at the same time, there could be an issue in your settings. Go into your network settings and disable your WiFi and check again. This may solve your issue.
- Try unplugging and replugging in your devices or your router. There’s a reason this is usually the first step in trouble shooting with an IT tech.
- Diagnose any problems with your modem or router. Check the LED lights on both to make sure you have an internet signal. No light or blinking signal could indicate a problem that needs to be addressed.
- Switch your cable to a different port. It could be a faulty LAN port. If this is the case you’ll want to return your switch or connect with your ISP for issues resolving faulty ports.
- Another option is to try using another ethernet cable, if you have an extra one available to make sure the issue isn’t with the cable itself.
- Update your software and computer drivers. It could be causing the issue. It’s also a good habit for keeping your devices secure.
- Run your network trouble shooter on your computer. This can help diagnose problems over your network.
- Check your cables – there could be a kink somewhere, cutting off the signal.
- If you’ve cut your cables to customize the length, you may have the wrong terminations on your wires and need to switch to the correct wiring scheme or the wires may not be inserted all the way in to the plug.
Hopefully these strategies help you to reconnect to the internet. If not, you may want to connect with your ISP for some technical support to make sure it isn’t a network issue.
Commonly Asked Questions About Install Hardwired Internet
Here are the answers to the questions that I get asked most often.
What is a hard-wired connection?
A hard-wired connection uses physical cables (ethernet cables) and ports to connect your electronic devices (tablet, computer, laptop, gaming console, even your cell phone) to the internet instead of wirelessly. It’s basically the opposite of WiFi and Bluetooth.
What are the disadvantages of Ethernet?
I think the benefits far outweigh the disadvantages but wired internet wires do come with some disadvantages. Here are what I think are the biggest disadvantages.
- They’re not as convenient as you have to have a physical connection to your router or modem. You can’t just scroll instagram or Tik Tok on the toilet or walk around with your device and still have a signal.
- All the cables can look messy unless you have the money to install wires throughout your house.
- Installation can be annoying and time-consuming depending on where you want to have internet, requiring long cables and adaptors for your electronic devices.
- It’ll cost money to buy all the ethernet cables and adaptors you will need.
What are the benefits of an Ethernet connection?
There are many benefits to hard wired internet, including:
- It reduces the amount of EMFs you are exposed to, which is much better for your health and anyone else living in your home, including pets.
- Increased speed and reliability: Hard wired internet connections are typically much faster and more reliable than wireless ones. This is because they are not subject to interference from things like walls, trees, and other objects that can slow down or block wireless signals.
- Greater security: Hard wired internet connections are also much more secure than wireless ones.
- What type of ethernet cable should I use?
There are many considerations when choosing an ethernet cable, which I discussed in a lot of detail above. Think about the length you need and the speed of internet you have and the upload/downloading that you need (cat 5=slowest, cat 8=fastest).
Definitely go with a shielded cable and the material you go with will tell you how long your cable will last. Copper and gold plated will last you the longest.
How many LAN ports do I need?
This depends on your individuals needs. Consider how many TVs, computers, consoles, and printers you have and the spaces in your home you’ll want internet. Fortunately, switches will give you up to 24 ports and splitters can increase the options even more.
Why doesn’t my laptop have an ethernet port?
With the shift to lighter, thinner laptops, many ports were removed, including LAN ports. Most people don’t use wired connections anymore so it wasn’t seen as a necessity. You can buy adaptors and Thunderbolt docks to hard-wire connect your laptop.
Summing It Up
Switching to hard-wired internet is going to be great for reducing the EMFs in your home and will improve the speed, stability, and security of your internet.
It’s not only great for you both short-term and long-term, but it also benefits your family, any kids you may have (or your ability to have kids in the future according to some research), your pets, and your neighbors.
It does involve planning, purchasing ethernet cables, a switch, and likely some adapters to make your electronic devices compatible with ethernet cords.
It’ll be harder to use your Android, iPhone, or tablet with a hard-wired connection in your home than it will be to connect your computer or gaming console, because you’re so used to using them wirelessly.
There are lots of things you can do to still reduce your RF exposure while using wireless networks on these devices. Remember the greater the distance from you and your RF source, the less exposure and reducing the amount of time you use it also really helps.
If you’re not ready to make the switch to hard-wired internet, the JRS Eco Router has the lowest EMF emissions. It’s my top recommendation for a wireless router.
If you’re looking for other ways to protect yourself from EMFs, check out my top recommendations.
If you have EHS, you will likely notice a difference in how your body feels very quickly after making this switch. Good luck with making this change and for anyone switching to hard-wired cell phone use and a completely wired home, hats off to you! Your future self will thank you.

